Have you ever thought of having new options for the signature of your documents? Of validating your domains yourself? Or requiring increased security for the return of your secure emails? Well, today, this is all possible.
As always, and to better preserve your confidential data, we have developed the following features to serve you better:
Here is the list of topics that will be covered
- Communications Management
- Added Signature Options
- Adding a Domain
- Subscription to our newsletters
- Time Zone and Country of Origin
- Return Protection of Secure Emails
 Communications Management
Communications management allows you to personalize your communications with your customers regarding signatures and secure emails. Although Secure Exchanges offers you default texts, it may be necessary to supplement certain communications to your customers.
Here are the steps to get there!
Once connected to your administrator portal, click on the Options – Manage templates button, and here you are on our new communications management interface.
Here, you can edit the emails that your customers receive when sending your secure emails via Secure Exchanges, namely:
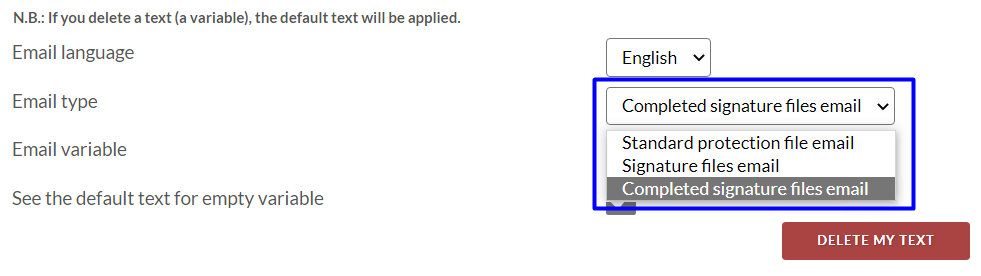
- The standard security email (entirely secured message)
- The file signature email
- The completed signature email
(Note that the system will not use an email with attachments sent just from Outlook or Gmail.)
For this purpose, you have the choice to personalize:
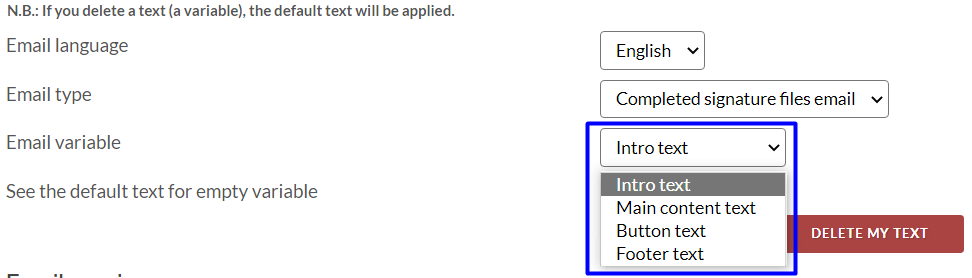
- The intro text
- The main content text
- The button text
- The footer text
As for the logo, you can insert it from the Company Management section.
If you wish to see the customizable aspects without the default template text, you can uncheck the ‘See default text on template for empty variables’ box.
If you do not change one of the variables, the default text will automatically be applied.
Once you have completed your modifications, don't forget to click on ‘save the model’ for your changes to apply. The modifications will be effective upon saving and apply simultaneously to all users, connectors, and the portal.
Note that it is possible to add texts and links; however, we do not recommend adding pictures.
 Added Signature Options
Our update would not be complete without adding new features for the digital signing of documents.
First, we have rethought the structure of the signature areas for less clutter. To do so, we have included a toolbar that allows you to choose the nature of the field for each selected signature area.
On the other hand, in addition to the accrued Signature, Initial, Text, Date picker, Date signature & Number options already available, we have added two new options:
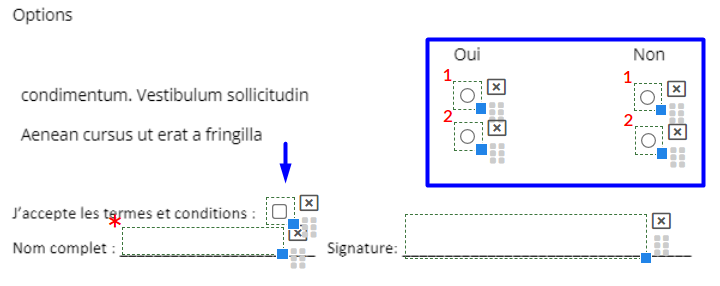
- A ‘Radio’ selection that your recipients can check if only one option is possible (note that you can classify your Radio buttons according to groups if you have several sections to choose from).
- A ‘Checkbox’ selection that allows your recipients to check the corresponding boxes in case of several possible choices.
Furthermore, for the appropriate field, you can define if one of the fields in the signature area is mandatory or not by clicking the ‘‘Required’’ button on the toolbar. Once you've done this, your email recipient will not be able to apply his signature without completing the required field. If the field is not mandatory, you can uncheck the ‘‘Required’’ button, and the field then becomes optional.
Unlike the ‘‘checkbox’’ buttons, which can be mandatory or optional as you choose, the ‘‘radio’’ buttons are mandatory, which means the recipient will need to select one of them to apply his signature on the document. You can also create one or several groups of ‘‘radio’’ buttons to allow the signatory to choose among one or several group options.
For example, if you require the signature of a service offer and want your customer to choose between 2 options, you will create a ‘‘radio’’ button next to each option, making sure they are in the same group. This way, your signatory will need to choose between options 1 and 2. In the same document, you can also have a second group option to allow him to choose among 3 new options further down in the document. You will then configure the second group of ‘‘radio’’ buttons to be in group 2.
Let's not forget that we can choose the nature of the signature area with keyboard shortcuts. Therefore, we remind you of the various shortcuts for defining signature areas. Immediately after drawing the area on the document, press:
List of shortcuts
- ‘‘t’’ for a text area
- ‘‘n’’ for a digital text area
- ‘‘s’’ for a signature area
- ‘‘i’’ for the initials area
- ‘‘d’’ to allow the choice of a date
- ‘‘a’’ to date the signature of the document
- ‘‘r’’ for a ‘‘radio’’ button
- ‘‘c’’ for a checkbox
 Adding a Domain
Secure Exchanges has just included an option that allows you to have your domain approved yourself to give you more autonomy. However, we want to remind you that as long as your domain is not approved, meaning until you have not supplied proof that you are its owner, you cannot add users to the domain.
To do so, connect to ‘Manage your domains’ on your account, then add your domain. You will see it appear at the bottom of the page, pending approval.
Then you must click on the little yellow circle in front of your domain's status, and a window will appear on your screen, with a cryptographic key that will allow you to create your DNS record.
You need to create this record on your domain host by following these steps:
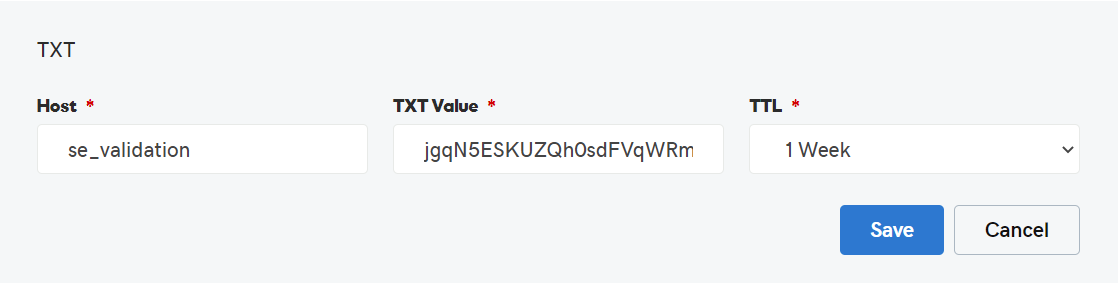
Image source : GoDaddy
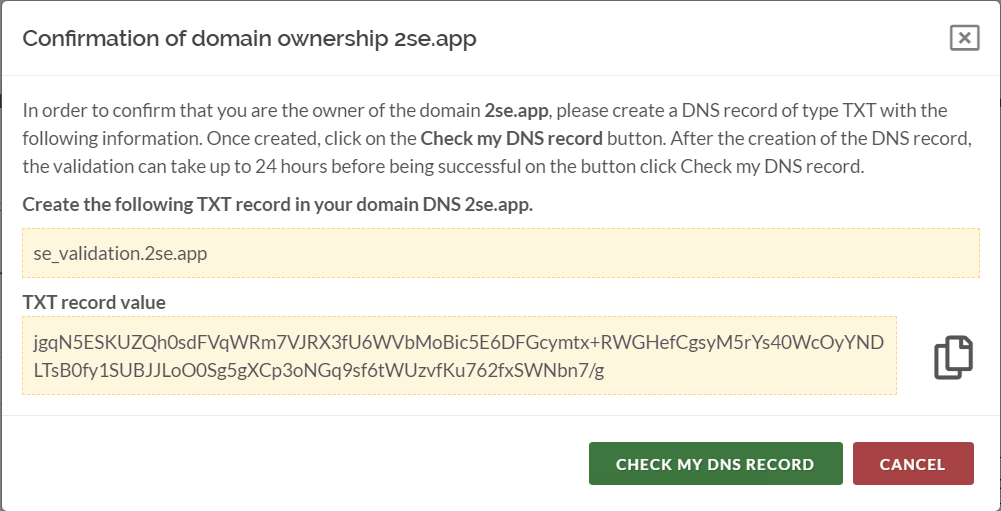
Image source : Secure Exchanges
- Choose a TXT recording
- Create ‘se_validation’
- Copy ‘the TXT record value’ from the Secure Exchanges window confirming domain ownership and paste it on TXT value.
- The TTL value will not change, so you need to define the TTL value that suits you.
- Save
At this time, you need to click on the ‘Check my DNS record’ button in the Secure Exchanges window.
Note that changes to your DNS can take a few minutes to a few hours for our servers to validate the added record.
If you wish to verify your domain’s TXT record, you can use the ‘DNS Tool’ https://mxtoolbox.com/supertool.aspx. First, you need to enter ‘se_validation.yourdomain.com’ in the search bar, then choose ‘TXT Lookup’ in the dropdown box beside.
Doing so will query the DNS servers and indicate if the key you just created is present. Once your TXT record is updated, you must manually click the ‘Check my DNS recording’ in the Secure Exchanges portal to confirm the validation of your domain. Once it is successfully validated, the domain will be automatically approved.
You can now add new users.
If you do not have access to your DNS recordings, you can request them from the provider who manages your domain and have them add the key for you.
You can also contact us at support@secure-exchanges.com if a problem occurs.
 Subscription to our newsletters
From now on, you can also control the subject of the communications that Secure Exchanges will send you.
To do this is very simple! First, connect to your account and click on ‘My account – Options’.
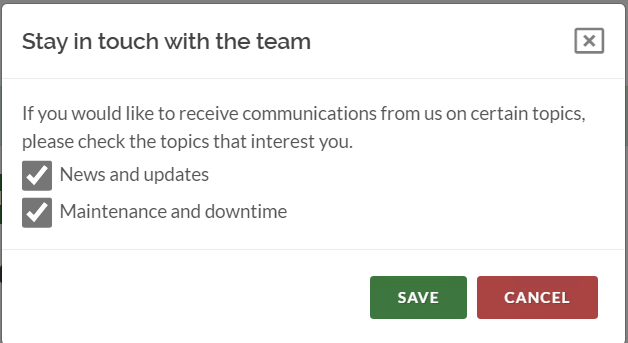
You will then see this small button ‘@’. When you click on it, a small window will appear and allow you to check the nature of the communications you wish to receive.
If you no longer wish to receive our communications, you can uncheck the options. Or else, you can choose among the subjects that interest you by checking the appropriate boxes.
This way, you will remain in touch with the Secure Exchanges team, and you will receive notifications according to the nature of the communications you have chosen.
 Time Zone and Country of Origin
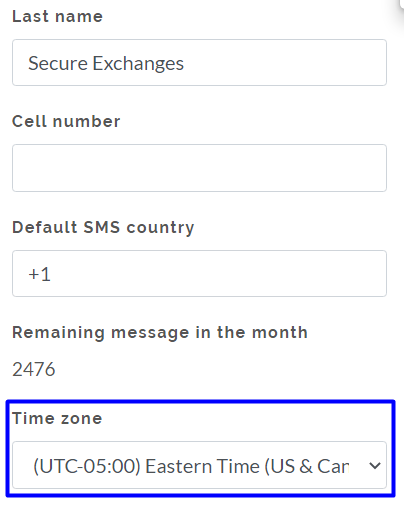
Our new update also allows you to define your time zone according to your country of residence. The default time zone is UTC. Once you have chosen the time zone, your logs and an opening notification will appear based on your time zone.
By logging on to our portal, you will see the ‘Time Zone’ box on the management page of your account. You can then select the appropriate time zone for your location and save it.
You can also set the area code for your country in the ‘Default SMS Country’ box. This way, when you select ‘Default SMS country’, your location will already be selected when using our connectors.
If you are an administrator or have the right to manage users, you can also change the time zone for another user. To do so, you must click on ‘Manage users’, then on the user profile icon, and then make the desired changes and save them.
 Return Protection of Secure Emails
Finally, in addition to all the new features mentioned above, we have decided to add a layer of security.
When you have a Secure Exchanges Licence Pro, you can now protect the return of envelopes or responses to your secure emails with the help of an automatic SMS code.
All you have to do is check the ‘Returns protected by SMS’ box on your Secure Exchanges account.
Note that, by default, the ‘Default SMS country’ will apply to your mobile phone if you enter a mobile number without specifying the country code. You may have a mobile number in a different country code than the ‘Default SMS country’. Ensure you have entered the correct mobile number; otherwise, you will not be able to open return messages and envelope returns
An SMS code will automatically protect all your returned envelopes and responses to your secure emails going forward.
Try Secure Exchanges for free and secure your confidential exchanges.
Start free trial →